Sensitive Light
Photography by Graham Jeffery
Sensitive Light
Photography by Graham Jeffery
Sensitive Light
Portfolio on an amateur photographer

Sensitive Light
Picture the world in a sensitive light
Sensitive Light
One man exhibition - private viewing
Sensitive Light
Welcome

These pictures are of smoke released by a burning incense stick. Smoke is grey to the human eye, but with a little post processing in Photoshop or similar editor the underlying colour can be revealed. For the technically minded, change the colour temperature and increase the saturation to see what I mean.
Smoke photography is tricky, not least because it is hard for the camera to focus on the smoke. With practice and a lot of trial and error some interesting results can be produced.
Not all incense sticks are created equal. If you find the type where the incense is bonded to a wooden core two types of smoke are created, one from the incense and one from the core. Being chemically different they give rise to differently coloured smoke. In the picture opposite you can clearly see both blue and gold colours. Neat

One summer day in contemplative mood I was watching a reasonably stable hoverfly in the air at a distance of about a meter from my face. How cool I thought, would it be to photograph the fellow. Of course this turned out to be more difficult than I had imagined. Over successive summers using a macro lens fitted with a ring flash I started to build my hoverfly collection. Mainly at rest, but I have managed to capture a few in flight.
I found that hoverflies are strongly attracted to lilies, so in hoverfly season I would buy a bunch from the florist and place them in the garden to attract the flies. They provide a strong colourful background for the subject.
The first time I came home with a big bunch of flowers and explained to my wife that they were not for her but rather to stand in the garden to attract flies, she was less than impressed.

When the shed at the bottom of the garden started to rot and offered more liability than protection for the kid’s bikes I was forced to buy a new one. Eyeing the dilapidated panels of the old shed I decided there was sufficient good wood to construct a rudimentary bird hide. After installing a few bird feeders, some tall shrubs and various branches to act as posing places I had a bird feeding station.
I used a 400 mm lens, sometimes with a 1.4 times teleconverter and I positioned the birds just beyond the lens minimum focusing distance.
Just a few hundred hours in the hide and I had a reasonable collection of garden bird photos.
I learned something interesting about feeding birds. If you, as I was, are troubled by squirrels stealing the seed, depriving the birds, and adding loads to your weekly seed bill, then help is at hand. If you coat the seeds in a strong chilli oil neither the squirrels nor any other rodent will eat the seed. A bird’s palate cannot detect the strong oil and they seem quite unaffected by the coating.

When you own a camera you are often asked to take pictures of babies and children, some believe it’s what cameras were invented for.
I went out of my way to encourage new parents to let me photograph their babies just so that I could gain experience in the genre.
The picture opposite is of my first and only grandchild, taken when she was 1 week old.

At their worst they are a bit of fun, but at their best these events can be stunning examples of ingenious creativity, spectacle, and just the pure joy of humanity.
Another side of these street events is that they give every photographer permission to be out in the street with their camera. Everything is fair game at a carnival, the procession, and the spectators, because almost every third pair of hands is holding a camera. Perfect training for the budding street photographer.

In this album there tends to be more pictures taken in a studio setting using lights. The decision to feature an image here is quite arbitrary as there are loads more portraits in the Carnival and the Strangers Albums.
I really enjoy photographing people in much the same way that I enjoy sitting in a cafe window watching all the passers by.
I can’t pin down what it is about certain portraits that make me want to share them. It’s probably just that general feeling of satisfaction or dare I say pride that I get when reviewing the image.
That’s my Mum to the left at 89 years old. Sadly Mum died when she was 90 so that picture is special to me in so many ways.

This topic is a bag of worms! Call it street photography or candid photography or as I like to think of it as photographing strangers. If I lived in France I would be breaking the law to take pictures of people in the street. Here in the UK it is not illegal, though people can become uneasy wondering what I am doing. Holding a big SLR fitted to a zoom lens is not as discrete as an iPhone.
In my opinion there is a great cultural and historic value to be placed in this genre of photography. A value that is not immediately evident in contemporary photographs, but that becomes more evident as time passes.
If we look now at street photography that was practiced decades ago we are enthralled by the environmental, fashion and cultural differences between then and now.
I can see the point of people claiming invasion of privacy, after all this is Sensitive Light and not Insensitive Light.
If you find a photograph of yourself here and it troubles you, then use the form below to drop me a line. Let me know which picture concerns you and I will remove it.

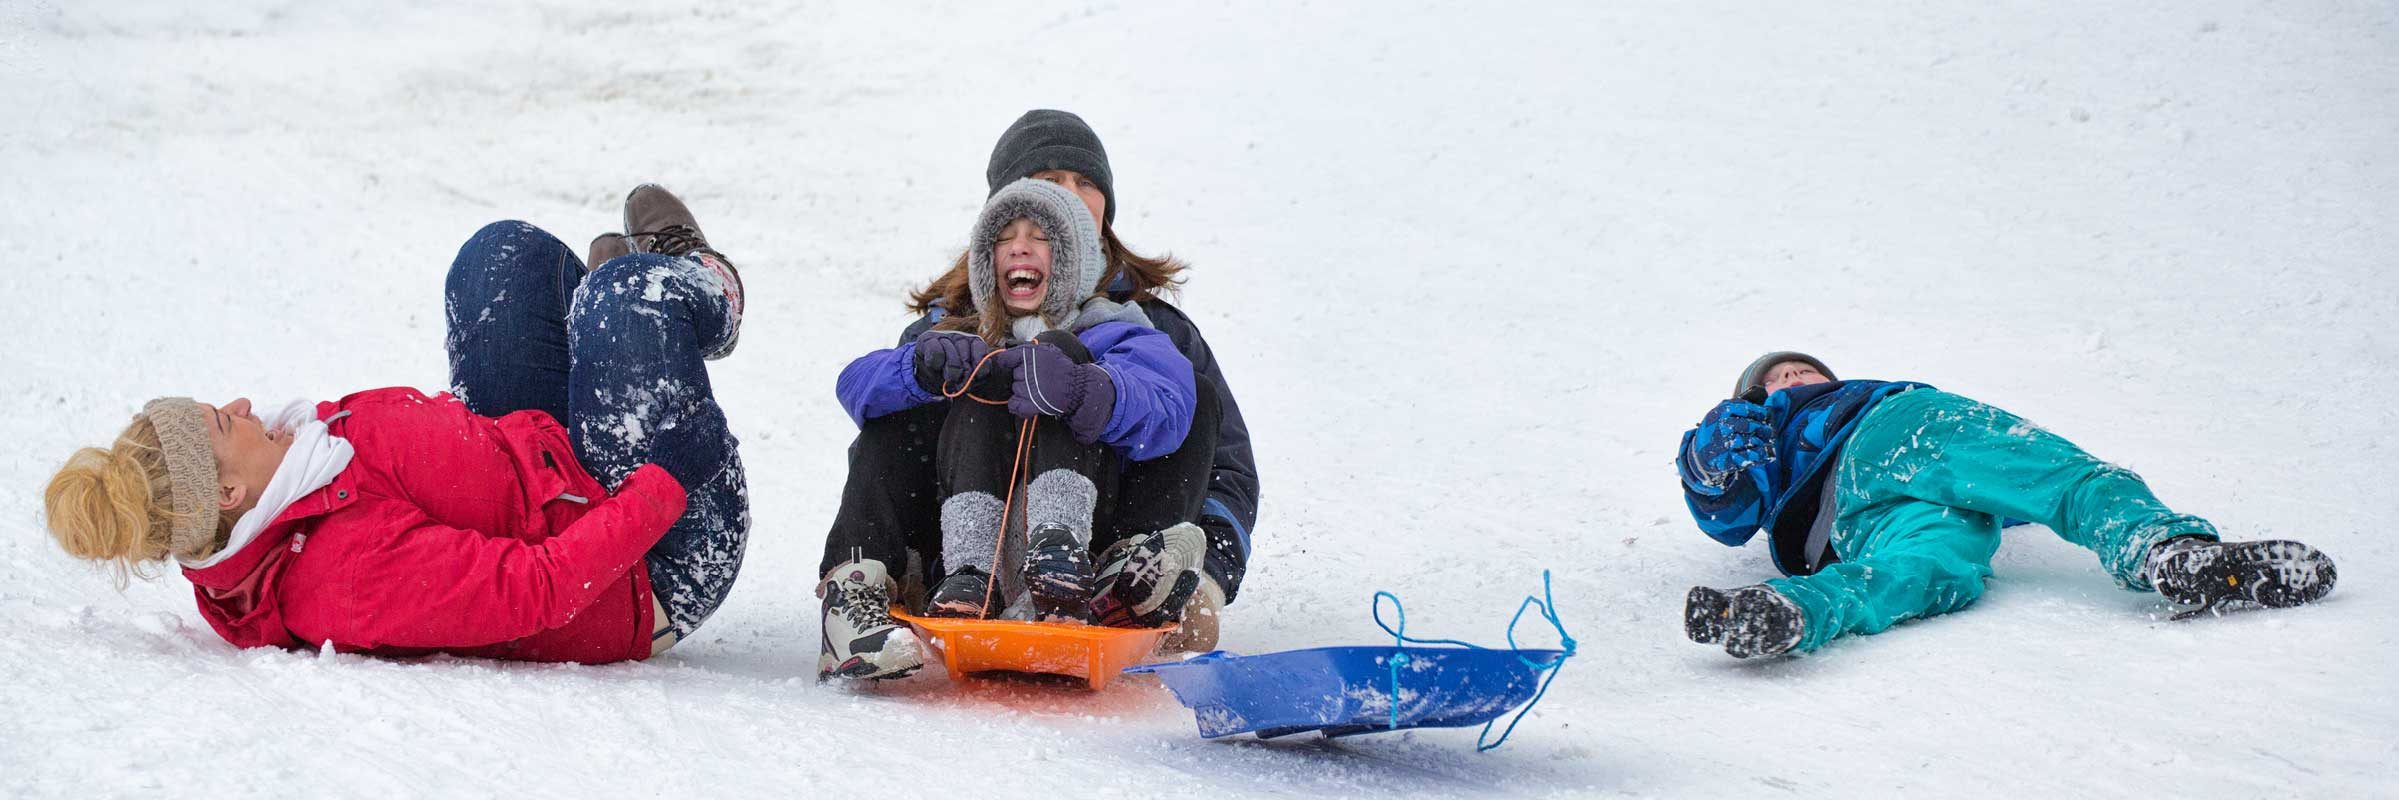
We don’t get much snow around here, so when there is an inch or two in our local park it’s on with the winter clothing and out with the sledge.
This album differs from all the others in as much as this collection of pictures was not amassed over years but is the output from one mornings shoot.
The biggest problem to overcome with this type of photography is getting your frozen fingers to press the shutter button.
")
Riding on dodgems is such great fun, and that is what I am trying to capture. Choosing to present such a colourful scene as a fairground dodgems ride in black and white is just another example of the perversity of photographers.
These rides are generally quite dark and shooting moving subjects in the dark can present problems so I tend to restrict shooting dogems to bright sunny days when the ambient light is sufficient to stop the motion.

Despite the spread of my pet projects listed above most photograph fall outside their range. As I don’t want to have a infinite list albums then of necessity I need a catch all collection for everything else. This is it.
Paging through these pictures in the Lightbox is a bit like reading a dictionary, each entry is quite different to the last. Each picture has to be assessed on its own and gets no support from the previous or next image. There are intentionally no captions, descriptions or backstories in the Lightbox to limit the imagination.
How a picture gets selected to feature in this or any of the other albums is quite subjective and very personal to me.
At its most simplistic a picture is here because I like it.